Making Sugared Flowers
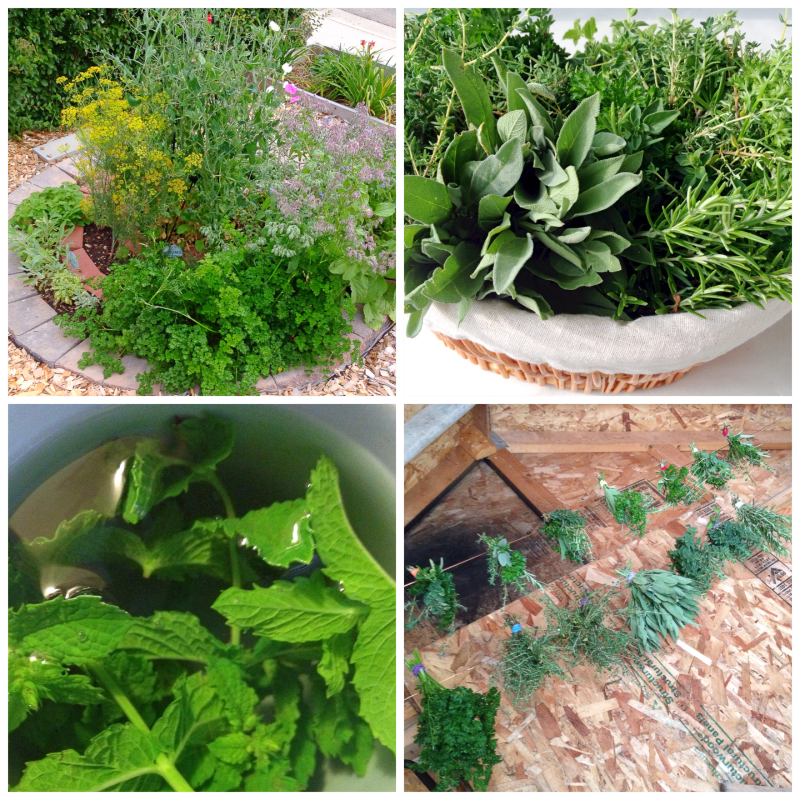
It’s August, which means it’s harvest time in the garden! I started with the herbs, as several of them were starting to flower already. I collected bunches of parsley, sage, rosemary, thyme, and oregano… as well as small bunches containing a sprig of each of those (to stuff poultry with later). I wrapped them at the ends with rubber bands (so that they’d still hold on when drying and shrinkage occurs) and hung them in the shed to dry (on fancy wire hangers I just added). Smells SO good! The mint had been shaded by the borage, so there wasn’t enough to collect and hang… but I made a delicious giant cup of tea instead (it was SO green!!!)
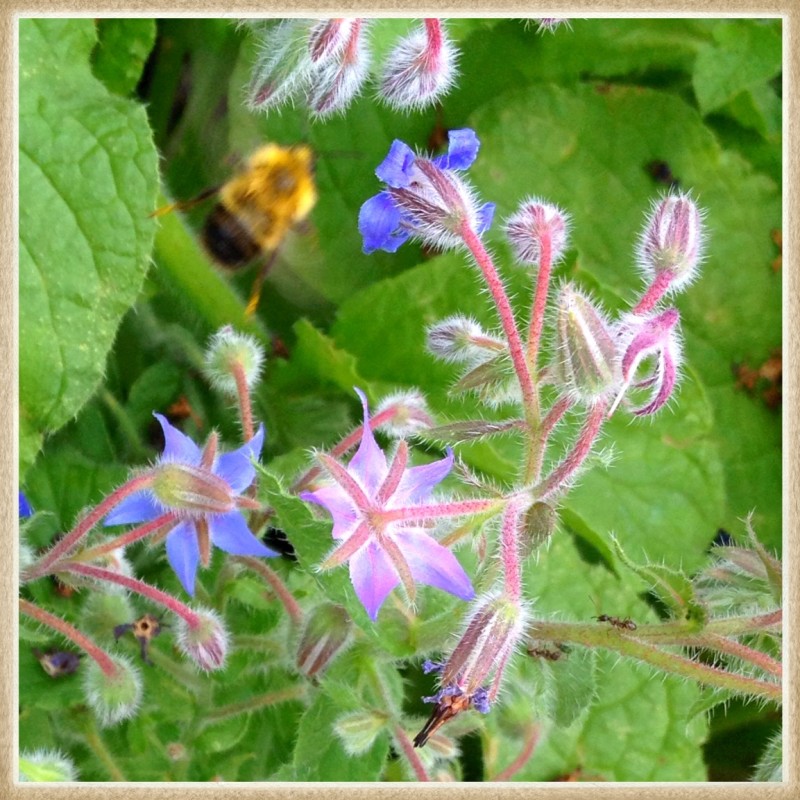
Then, as all the bees were buzzing about the borage, I decided I wanted to do something with that too. Normally, I just grow borage because the colourful star-shaped flowers make me (and the bees) very happy… so I needed to research how borage can be used. PLEASE make sure what you grow is safe to eat before you do so!
I decided to try sugaring the flowers as my first foray into borage usage – they taste delicious and would be so pretty to pull out in the dead of winter!
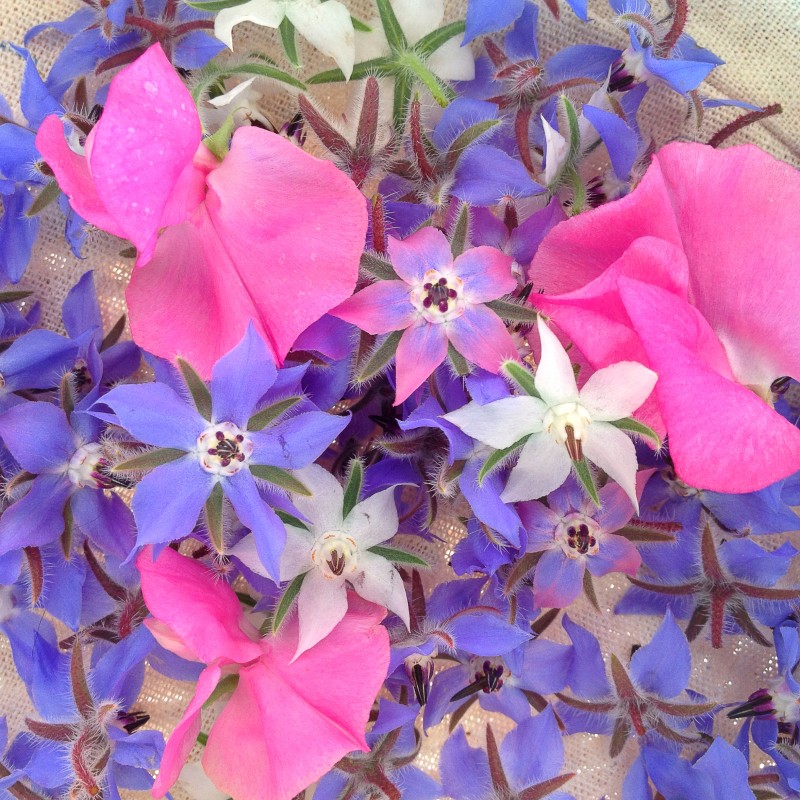
So, amidst the busy bees, I collected a bunch of flowers – mostly purple, but a few white and even some pink-tinged (which I read means they may not be doing as “well” as the regular flowers). I threw in a few sweet pea blossoms too, thinking I might try to sugar them as well – until I found out they’re considered poisonous!!! DO NOT EAT SWEET PEA FLOWERS!

For supplies, I lined a cookie sheet with parchment paper… cleaned off a fresh paintbrush… whisked an egg white with a tsp. of water… and pulsed some regular granulated sugar in the food processor until it was finer (next time, I think I’ll buy the fine sugar in the store as mine was a bit… irregular). After getting really gooey with the first one, I also added a pair of tweezers to the mix.
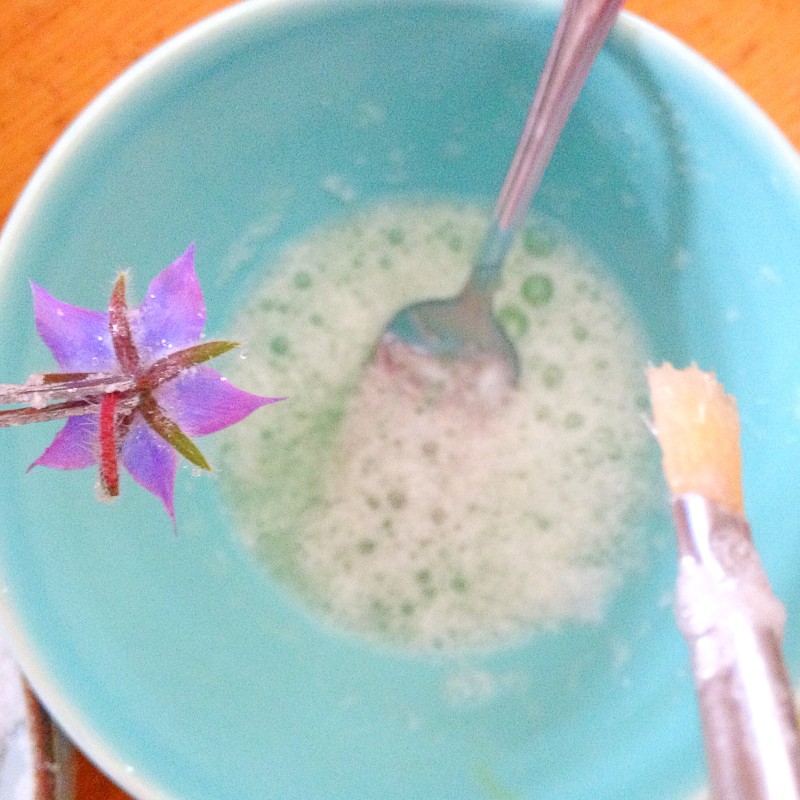
I had left a wee bit of stem for the tweezers to hold on to… which I used to grab the individual flowers. Starting with the underside of each flower, I painted a light coat of egg wash on the flower… and then flipped it over and painted the top. I also dabbed around the stamen (the dark sticky-out part in the middle) for good measure.
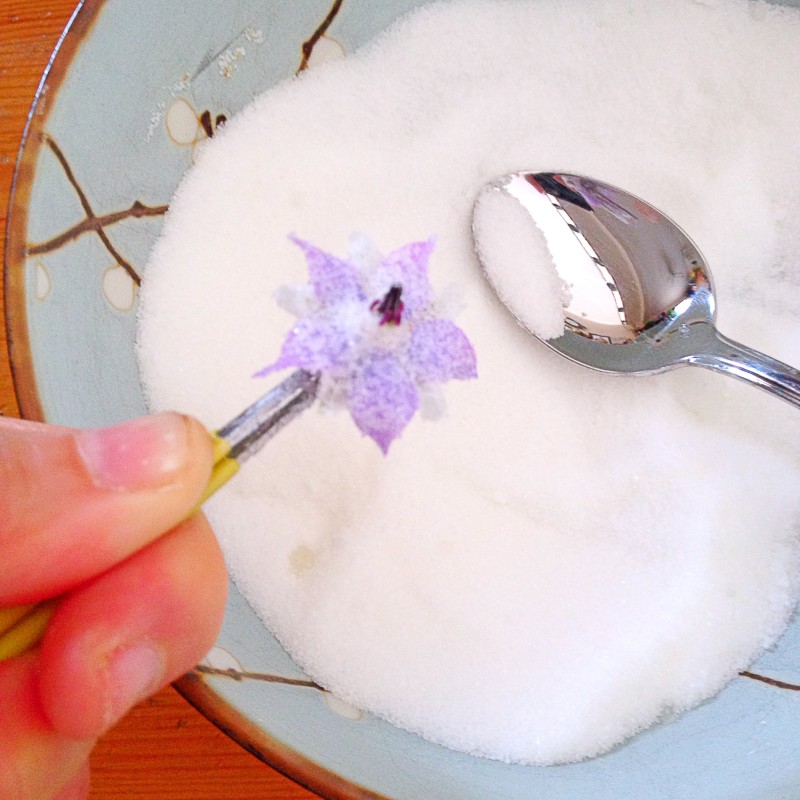
Next, I used a spoon to sprinkle some of my “fine” sugar onto the back and front, over the egg wash. Once I felt the egg was covered, I’d tap the tweezers on the edge of the bowl to remove the excess, and then place the flower on the parchment paper for drying. The tweezers got a bit gooey and had to be scraped off (on the side of the bowl) every flower or two to keep them gripping.
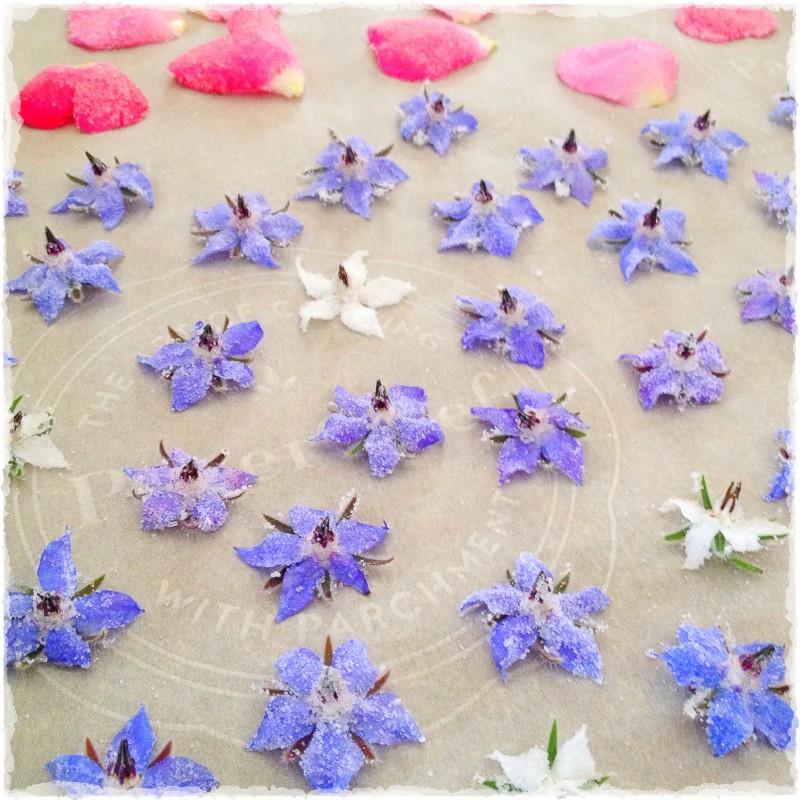
I did these while “watching” some TV, as it is a time consuming process. When I was done with the borage, I plucked a few rose petals to try as well. As you can see, some of the flowers look a bit “gloopier” than I hoped… but I’m sure they’ll taste just fine (judging by the few I “tested” after they’d fallen on the floor!)
Let them dry (until the petals are really stiff – a day or two), then store in an airtight container, separating layers with paper, at room temperature for up to a year! I can’t wait to try some on a cake or ice cream or in some tea! Yum.
Well, that’s it for today. Happy harvesting! =)

2 Replies to “Making Sugared Flowers”
My goodness, Kate, I’ve not heard of doing this, and they are really beautiful!!
Yummy too! =)