Shadows Screens And Playing With Light
There was a time, a long time ago, when I took on random sewing projects for my friend Tara while she was working at Evergreen Theatre. It was there that I was introduced to the use of plastic ABS pipes & fittings as the frames for sewn backdrops. I remember spending hours making this giant, floor sized, fabric map of Canada one time… but naturally, I can’t find a single photograph of it anywhere. So, here is a teddy bear costume I made, standing in front of somebody else’s fabric screen instead. 😉

I later went on to work for the City of Calgary, and constructed them a frame + fabric puppet show screen that was used in their elementary school nature programs (again, no photo)… and after that, I built a shadow screen for my friend Alice for her Ndlovu show presented at Loose Moose Theatre.

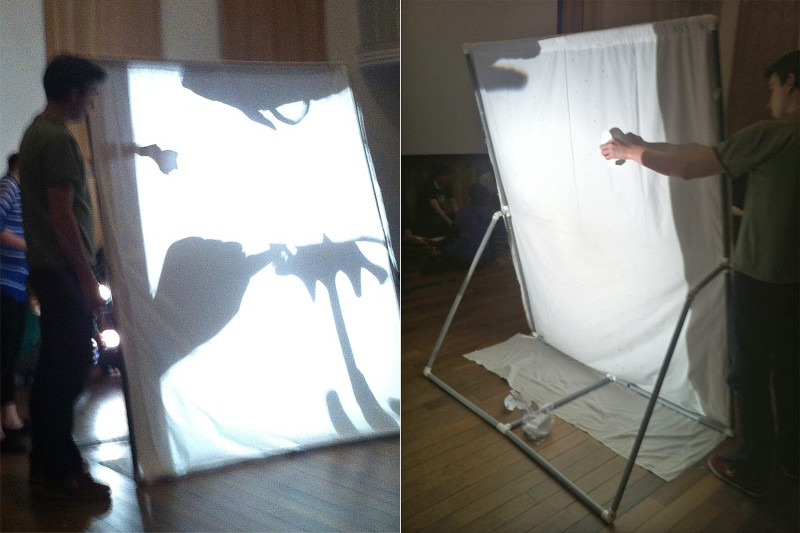
Well, last month I got a request from Alice to make a couple more screens. Her grant for Animal Farm came through, and she needed two new screens… and they needed to be around 6’x7′ and to look something like this:
So… off to work I went! And for those of you who may be interested in doing such things yourself, I’ll walk you through the DIY process for each frame.
SUPPLY LIST (per screen), using 1½” ABS:
- 4×12′ lengths of ABS pipe
- 6×90° corners (L-shaped)
- 2×180° joints (T-shaped)
- 2×45° joints (Y-shaped)
- 1×180° joint (I-shaped coupler)
- 1 can ABS cement
- 2m Velcro (both hooks and loops)
- 1 tube good glue (I used E6000)
- 1 king sized sheet, plain & white
- 1 spool thread
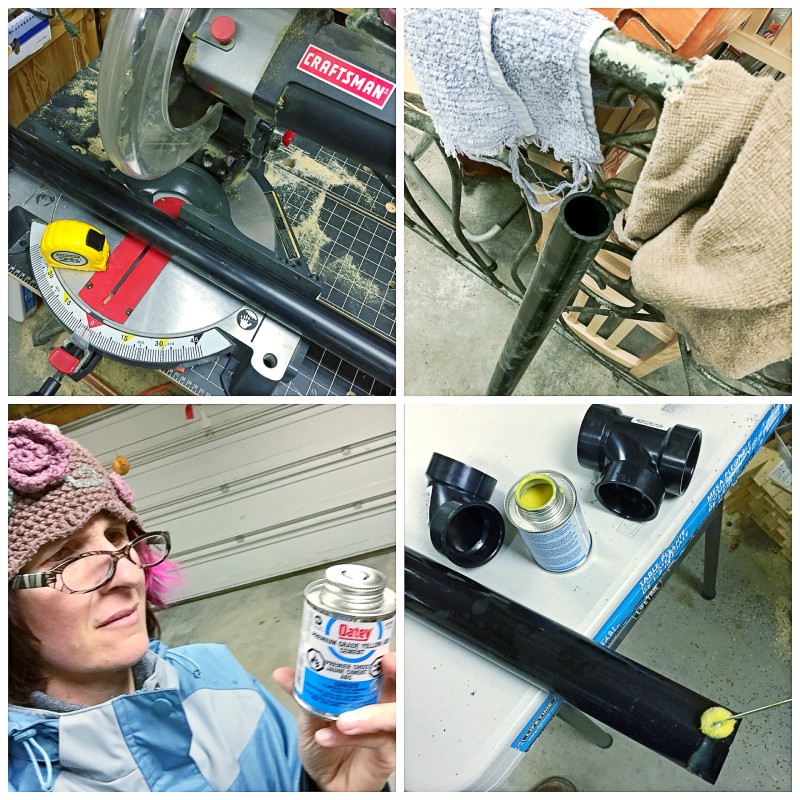
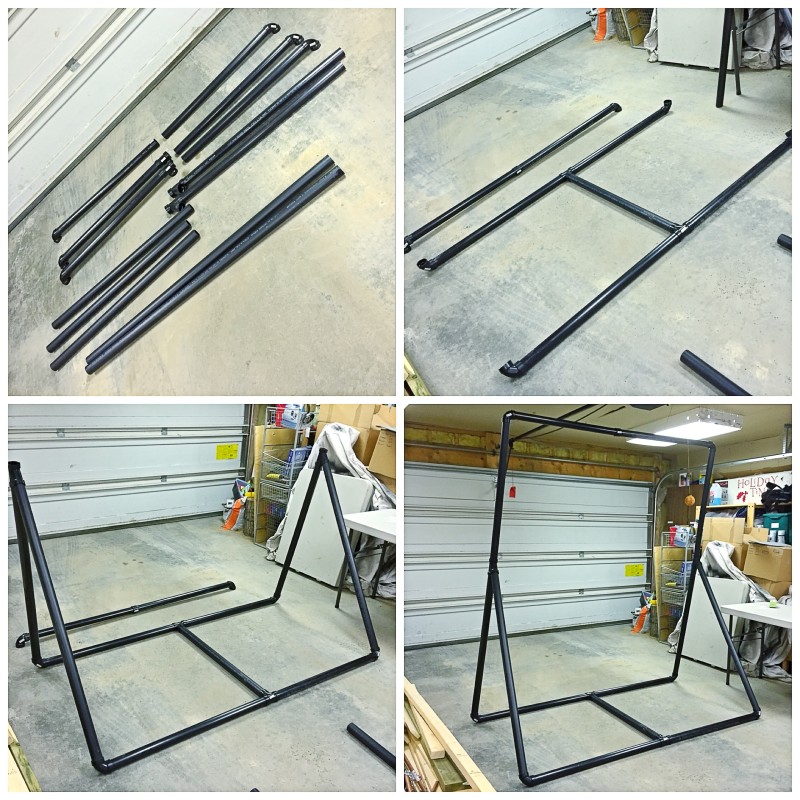
First, cut the pipes to length (I used a miter saw this time, but have used a hand-saw and miter box previously):
- 1 pipe into 4×3′ lengths
- 1 pipe into 3×3′ lengths + discard piece
- 2 pipes into 2×3.5′ lengths each + 2-remainder pieces
Then, clean them with a wet towel, dry them, then apply the cement and fittings. (The instructions on the cement canister were SO tiny, I had to go and find some reading glasses! =P)
Cement on the fittings as follows:
- to 6 of the 3′ lengths, add the 90° corners at one end
- to 1 of these 3′ pieces just glued, add the 180° coupler at the other end
- to 2 of the 3.5′ lengths, add the 45° angles (hold the joint so it looks like λ and insert the pipe into the “lower right” hole)
- leave the 180° T-joints loose for now: DO NOT CEMENT YET
Let the cement set/dry. Now, this is where things get a bit more complicated.
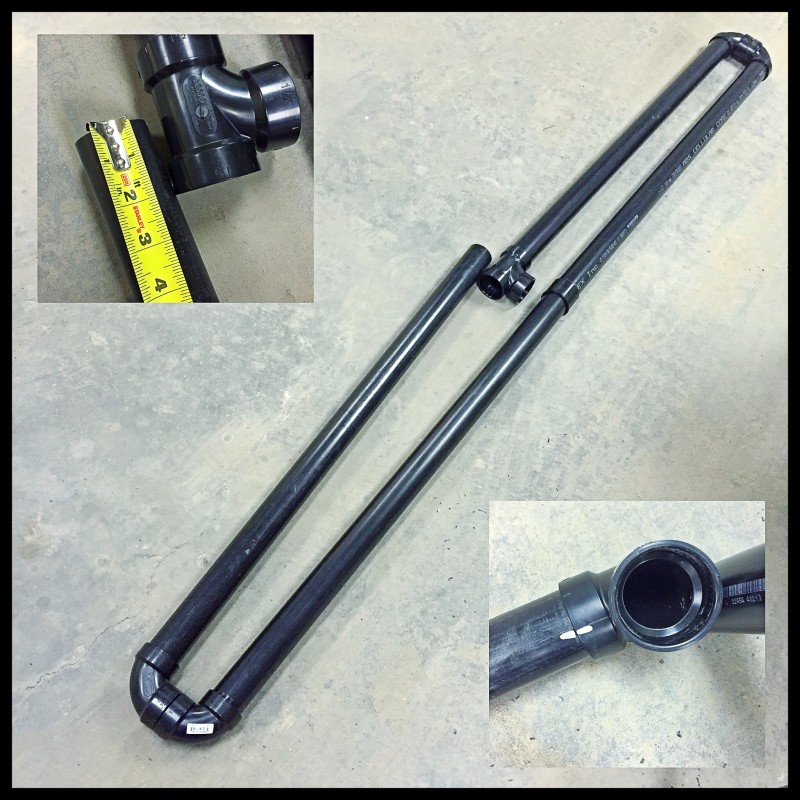
When you attach one 3′ length to the one 3’+180°coupler length, this be comes the “top” of the frame. However, the “bottom” of the frame has a 180° T-joint which is much wider than the 180° coupler. SO. Assemble the top segment. Take two of the 3′ lengths and lay them parallel to the “top”, matching up the corner joints. Loose fit one of the 180° T-joints onto one of the free ends (as above). In my case, there was an extra 1.5″ that needed to be trimmed off one of the 3′ pipes so that the “bottom” would be equal to the “top” (remember, you need to have ½” to insert into the joint). Loose fit the “bottom” pieces together to make sure they are the same length as the “top”, and if so, you can go ahead and do this one more time with the remaining 3′ pieces (because there are TWO “bottoms” in total). DO NOT CEMENT YET.
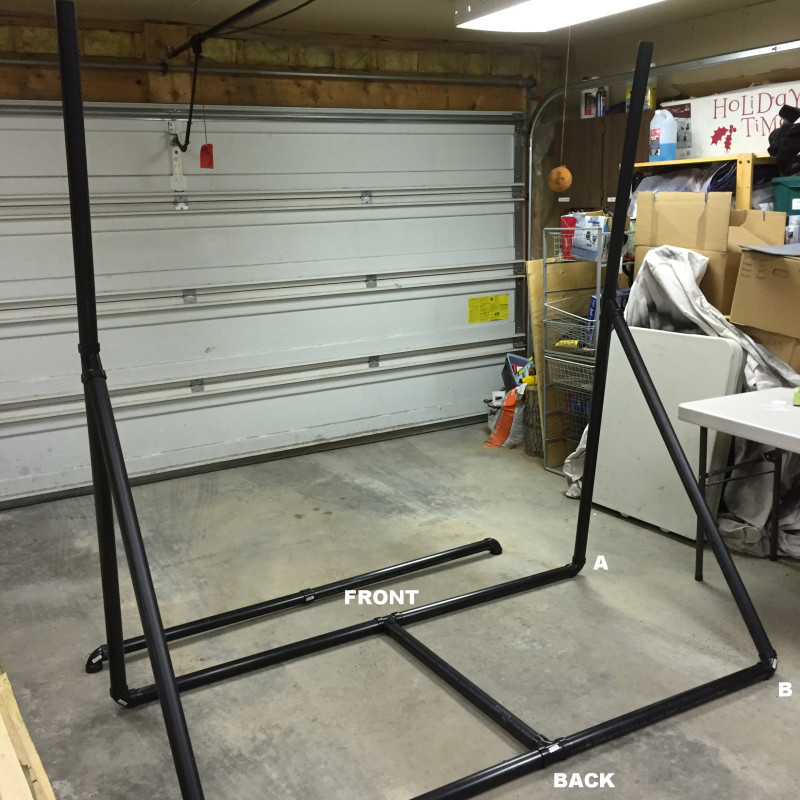
Okay. Now, you need to assemble the frame base. First, lay out those two “bottom” segments. Attach front to back by loose fitting the one non-jointed 3′ piece into the T-joints. As you can see in the above photo (and you may have to adjust as you go), one of the T-joints will come off at about a 90° angle to the corners (the “front”), and one will come off at about a 45° angle to the corners (the “back”).
Loose fit the “remainder” pieces into the other side of the “Y” joints (to form a “V”). Insert the “straight” end into the front at “A”… and then estimate where to cut those “remainder” pieces so that everything will fit nicely at “B”. By Pythagorus, a²+b²=c², so it should be just under 5′. It might take a few visits to the saw, because you need to go slowly (it’s easier to trim away more pipe than it is to try to *add* length to it…) Test and trim those “remainder” pieces to fit.
Okay. When everything fits nicely, you can go ahead and mark exactly how the T-joints are aligned at both the front (~90°) and back (~45°) and cement them AT ONE END ONLY. Do NOT cement them at the part where they connect to the other bottom segment. Do NOT cement *both* arms of the T (because you want to be able to disassemble the frame for storage). And do NOT cement the “remainder” parts into the “Y”. (NOTE: You’ll want the frame to tilt just a little backwards instead of being strictly perpendicular to the floor, so your angles may not be exact…)
Once the glue has dried, you can go ahead and add the top pieces – the two joint-free 3.5′ pieces going up from the Y-joints, and then the “top” corners at those ends.
Now… at this point, I measured the frame, and it was slightly larger than 6’x7′. In fact, I could barely add the “top” segment (as I am only 5’7″). So. I chose to trim some of the pipes down (at all the joint-free ends) so that the frame was better sized. 😉 If you’re tall, or just don’t care, you won’t have to do this.
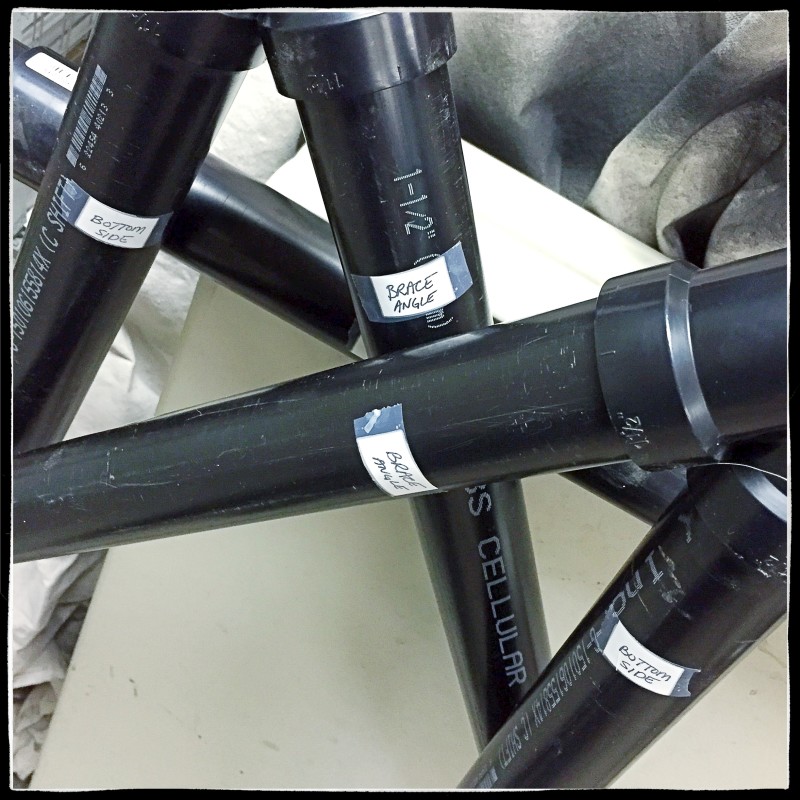
Next, I labeled all the pieces so that it would be easier to assemble the next time.
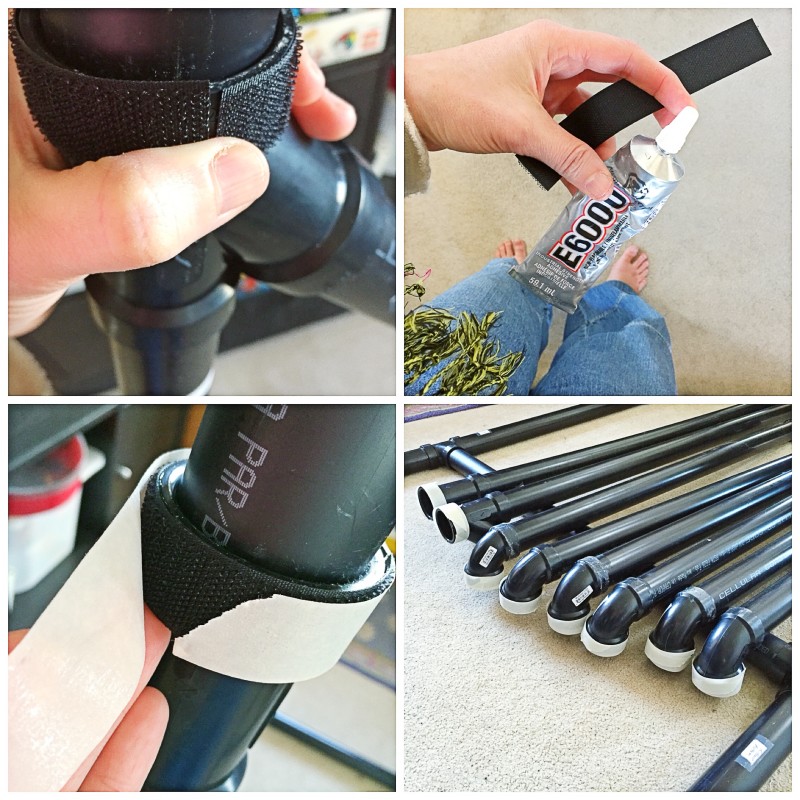
Okay. Add Velcro in 6 places on each frame: 2 at the top corners, 2 at the Y-joints, and 2 at two of the bottom corners. Cut the hooks part of the Velcro to length. Apply some E6000 glue. Wrap the Velcro around the joints, fitting it snugly. And then tape them in place until the glue sets. (Of course, if you’ve got some big clamps, you can just clamp the Velcro until it dries. Or heck, clamp the sheet to the frame and ignore the whole Velcro part altogether. 😉 )
When the glue is dry, take out the king-sized sheet and test which direction it fits best (I held it in place temporarily with tape to get a better idea).
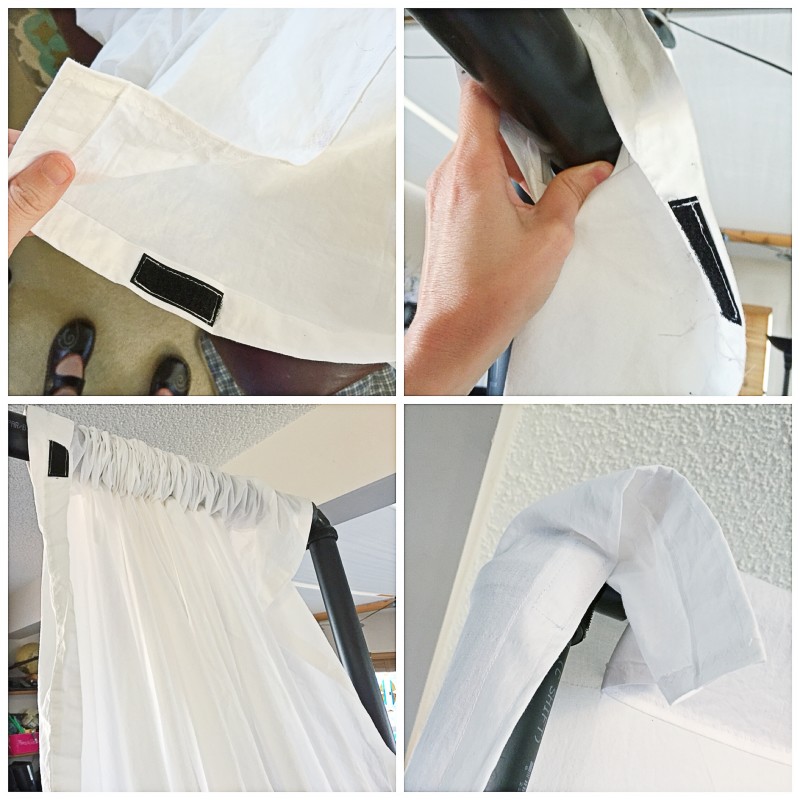
First, sew a 5″ tube (to be able to slide along the “top” piece) along one of the shorter sheet sides, leaving 5″ open at each end (to be able to wrap around the frame and attach to the Velcro at the top corners). Then, thread the screen onto the top of the frame and stretch it out. One “side” of my sheet already had a 1″ hem in place, so I took 3×2″ pieces of Velcro loops and lined them up and pinned them on the fabric. (If your hem is smaller, no worries. Just make sure that some of the Velcro is sewn onto it.)
(NOTE: the hook Velcro on the frame wraps around horizontally, but I added the loop Velcro to the screen vertically, making the middles line up at the side of the screen. This gives you a Velcro “+”, and a little “wiggle room” when you put the screen on – it doesn’t have to be in exactly the SAME spot each time, and if the screen should stretch/shrink, the Velcro will still hold it it place well.)
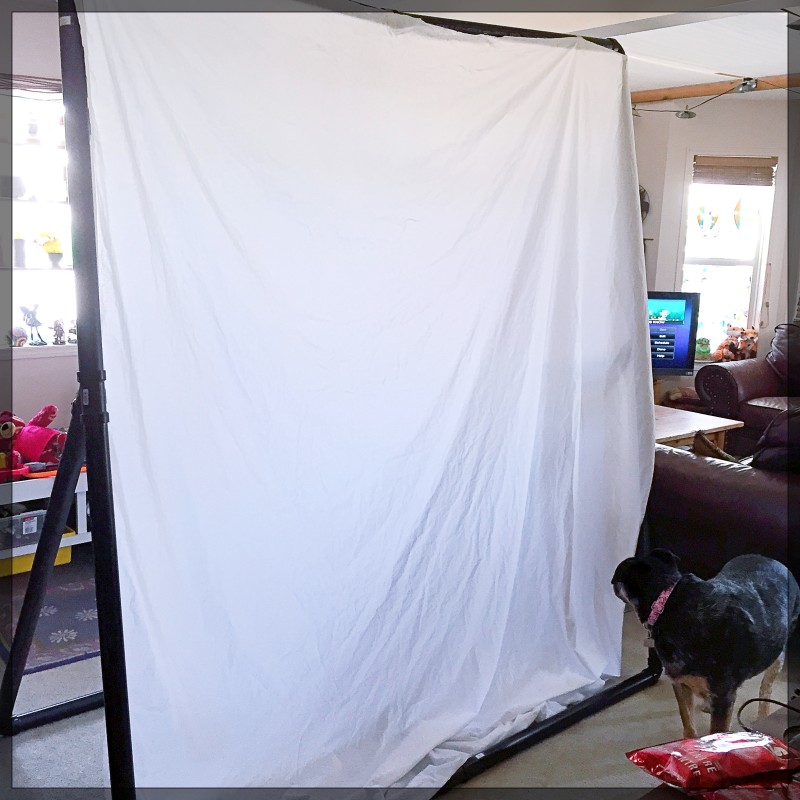
Attach the screen to the frame using the pinned-on Velcro. Stretch out the screen to the opposite “side” and measure how much needs to be trimmed to leave another 1″ side hem. Remove the screen. Head back to the sewing table to trim and hem the second “side”. Add 3 more 2″ strips of Velcro at the same places as the first side. Go and put it back on the frame, pulling it taut and Velcro-ing it into place. Tuck the bottom of the screen under the bottom of the frame.
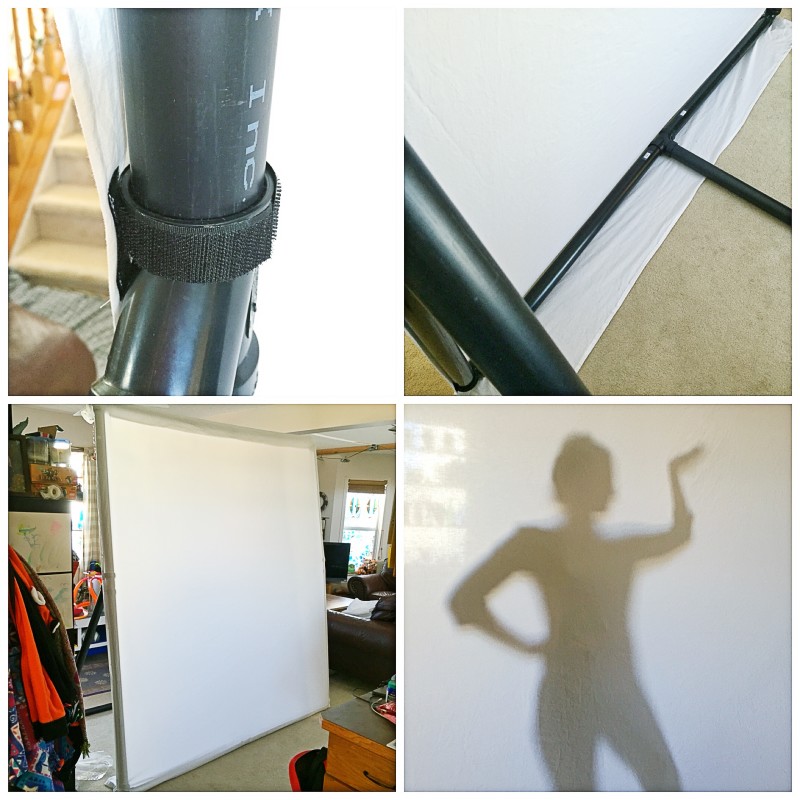
And voilà!
I know it all sounds very confusing… but if you’re a visual learner, like me, hopefully the photographs will help you figure it all out. 😉
I love that ABS is SO versatile. Not only can it be collapsed for easy storage/transportation, but the fittings stay snug after years of use! Plus, this screen could be altered to accommodate almost any dimensions (given appropriate bracing)… or the pipes & fittings used to make all SORTS of things (whether using ABS, or its cousin PVC)!!! Check out these PVC projects. Not to mention all of the fun you could have with screen decoration…
Anyhow. That’s one of the projects I’ve been working on lately, and I just thought I’d share. I’ll post photos of Alice’s show once it is mounted. Let me know if you’ve completed any fun ABS/PVC projects yourself, or if you’ve tried this tutorial. And if you have any questions, please feel free to ask. Happy building!
