Mountain Mermaid Scarf
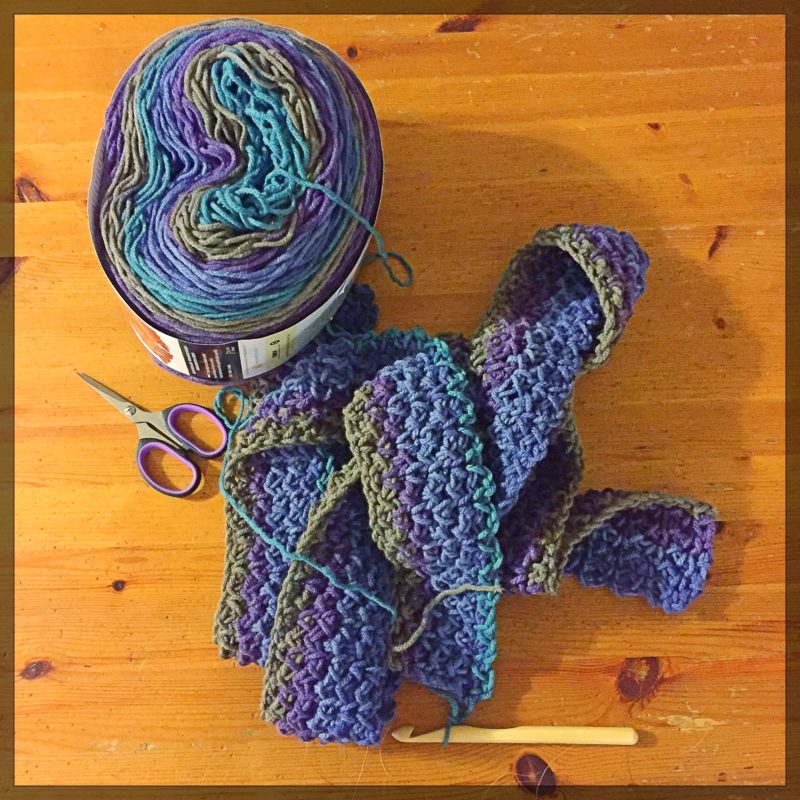
While we were touring around in our van this summer, I happened upon some great yarn on sale at the good ol’ Walmart in Great Falls, MT: Lion Brand “Mandala” yarn – in Chimera.
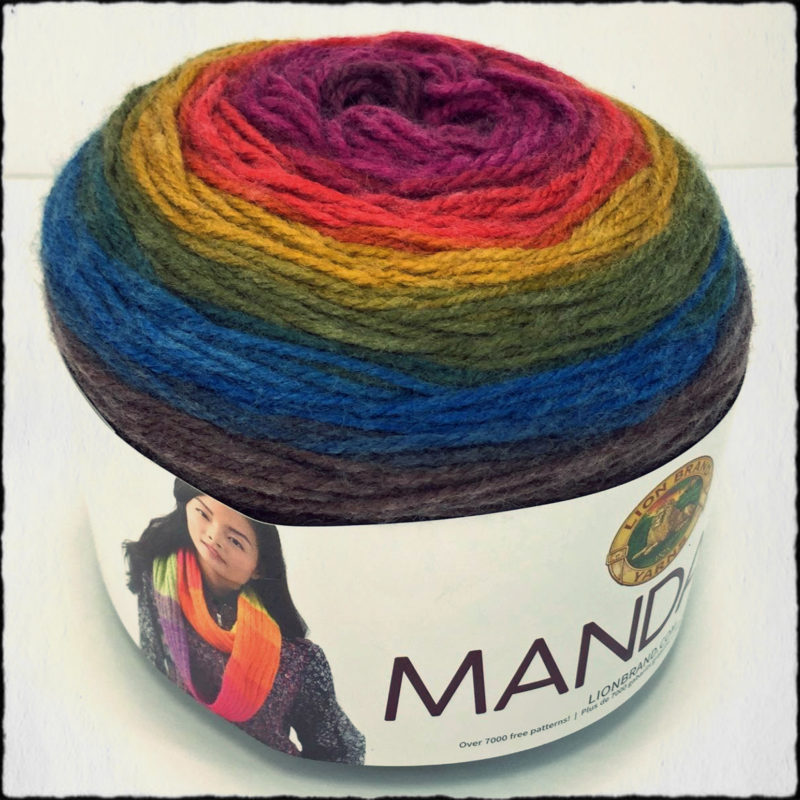
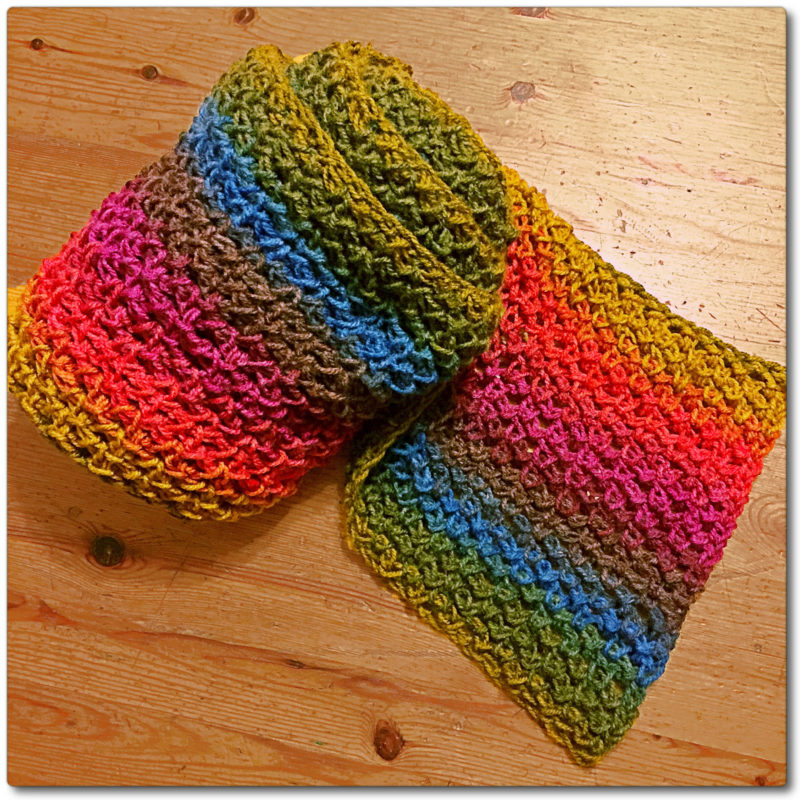
I’d never seen a big variegated “cake” like this before (150g/540m), and it was in a different gauge than what I was used to (light vs. worsted or chunky weight), so I only picked up one – for the bargain price of $4.97, I might add! I loved the fall colours and the ombre effect, but I wasn’t exactly sure what to do with it…
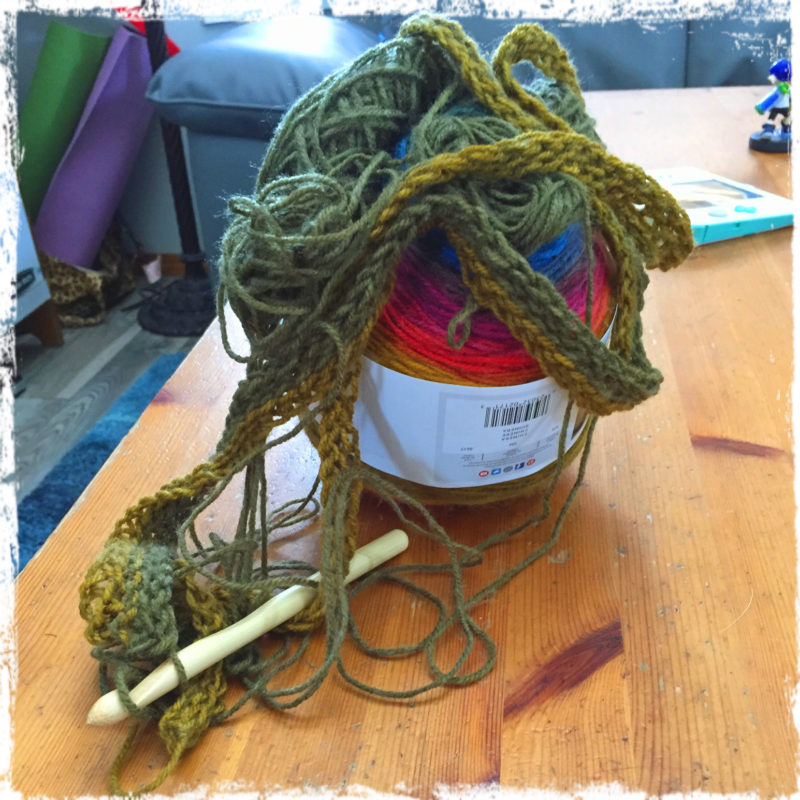
I’ve gotta admit, I took several runs at it (I must have started over at least a dozen times) before finally deciding on a longer scarf. A crocheted scarf, so that I could adequately display the lovely colour gradation in long rows rather than blocky chunks (if I had knit it as shown on the wrapper). And I wanted to find a “loose” stitch, because the colours/ombre tones also reminded me of mermaid scales somehow, and regular crochet stitches were too tight and thick for what I was imagining…
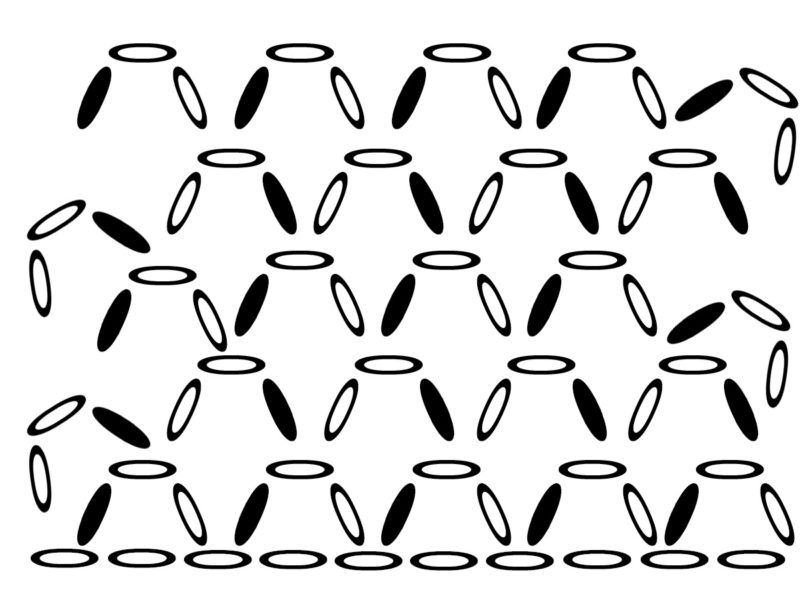
Ultimately, I decided on just using basic chain stitches and slip stitches, in the pattern you can see in the above diagram (I hope I made it correctly).
- Chain stitch your scarf length (I used 230 stitches) using a large crochet hook (I used a 10mm)
- Chain two more, then slip stitch through the next-to-last stitch you made in your original chain
- Chain two, skip a stitch, slip a stitch. Chain two, skip a stitch, slip a stitch. Repeat until you get to the end of your row
- Turn your piece around, and after you’ve chained two stitches, slip your stitch through the first “loop” you’ve made with your stitches in the row below
- Chain two, slip a stitch through the next loop. Chain two, slip a stitch through the next loop. Repeat until you get to the end of your row
- Turn your piece around, and just keep going in the same pattern until you get near the end of your “cake” of yarn
- NOTE: the loops at the end of rows are smaller than the rest (because you are also going “up” a row), and you may have to hunt to find them (or you can try chaining 3 as you go up a row, to make them easier to find, but I have no idea what that might do to the edges of the scarf)
- To finish, instead of chaining two stitches, just chain one – chain one, slip one through the loop, chain one, slip one through the next loop, and repeat until the end
- Tie it off, and you’re done
I’ve included some photos below to clarify…
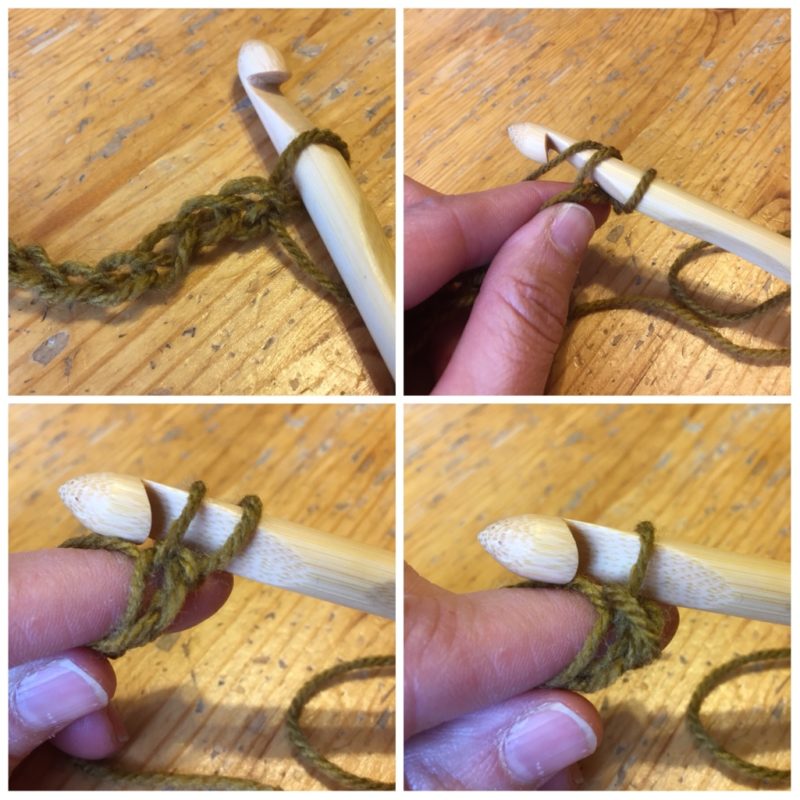
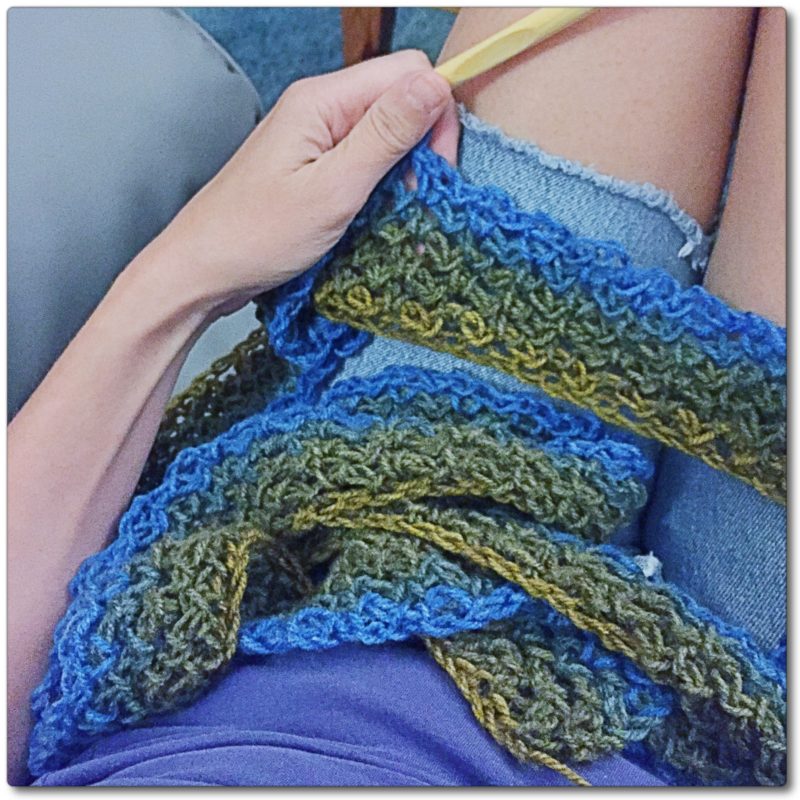
Chain your scarf length. Chain two (for the second row) and put your hook through the next-to-last stitch in the original chain. Pull the yarn through that stitch AND through the stitch on your hook (i.e. slip a stitch).
Chain two more. Put your hook through the second stitch away from the one you just slip-stitched into (i.e. skip a stitch). Slip a stitch (through the chain AND the loop on your hook). Chain two, skip a stitch, slip a stitch. Repeat to the end of your original chain.
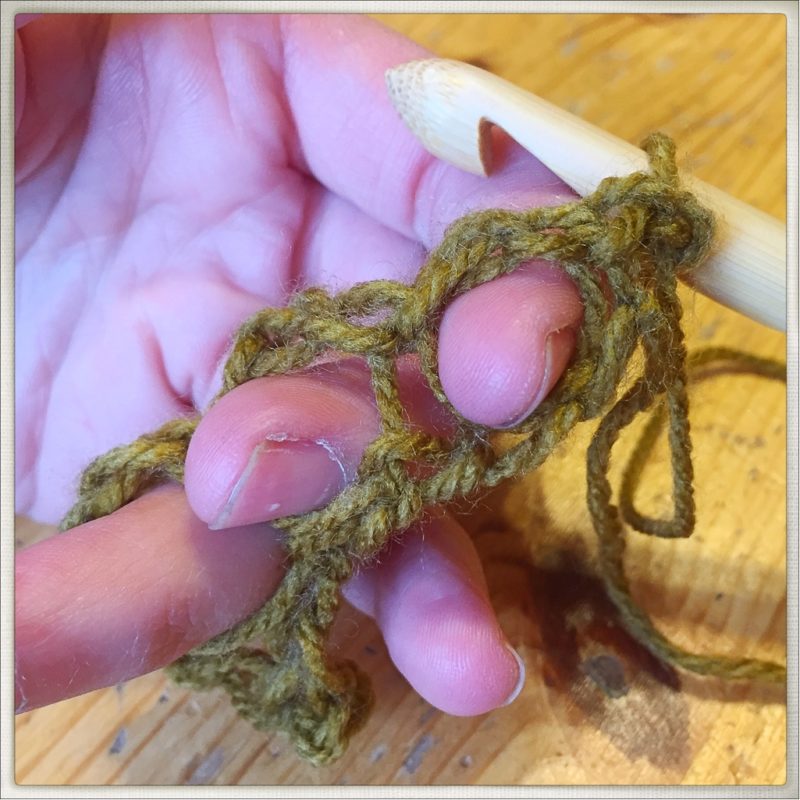
As you can see, you are actually creating loops that you are going to be using as your base to slip stitches around to create net-like rows. 🙂
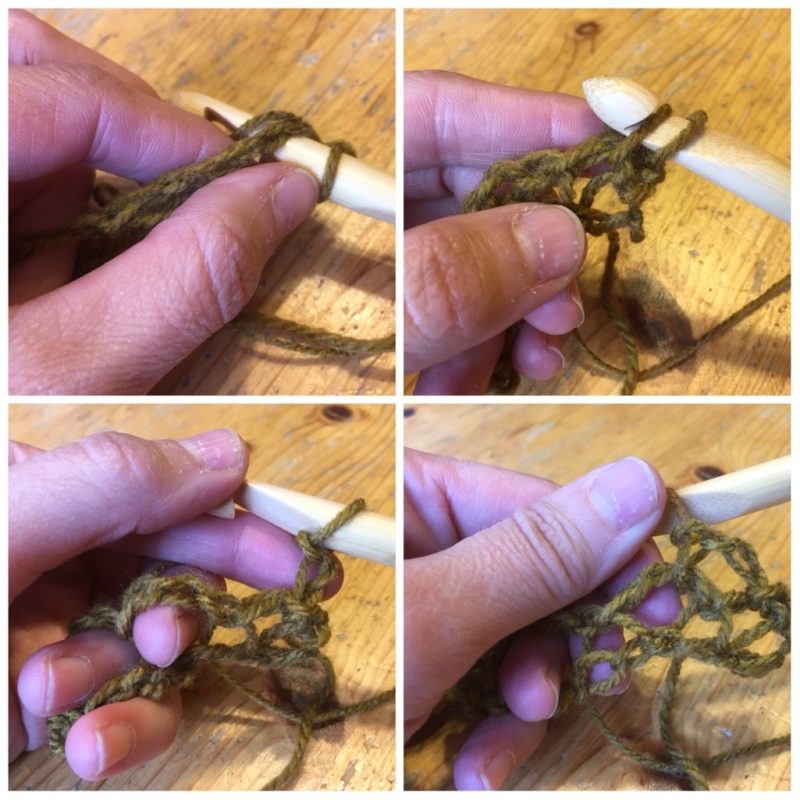
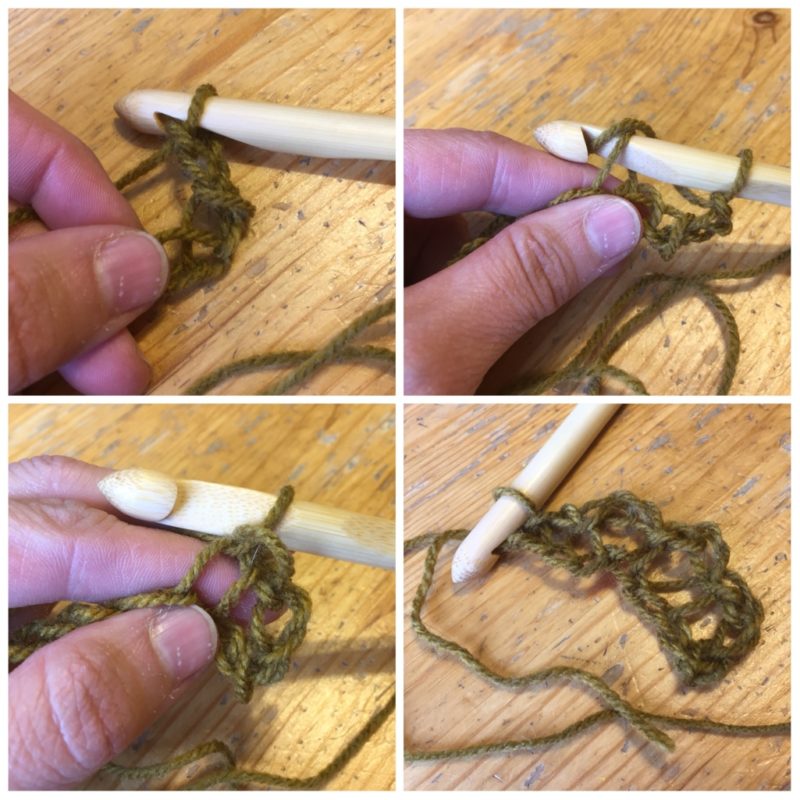
At the end of your second row, turn your piece around. Chain two (for the third row/second row of loops). Find the last loop in the preceding row and slip a stitch through it (remember: yarn goes through the loop AND through the yarn on your hook). Chain two. Slip a stitch through the next loop in the row below. Chain two. Slip a stitch through the next loop. Repeat this pattern until you’re almost at the end of your yarn.
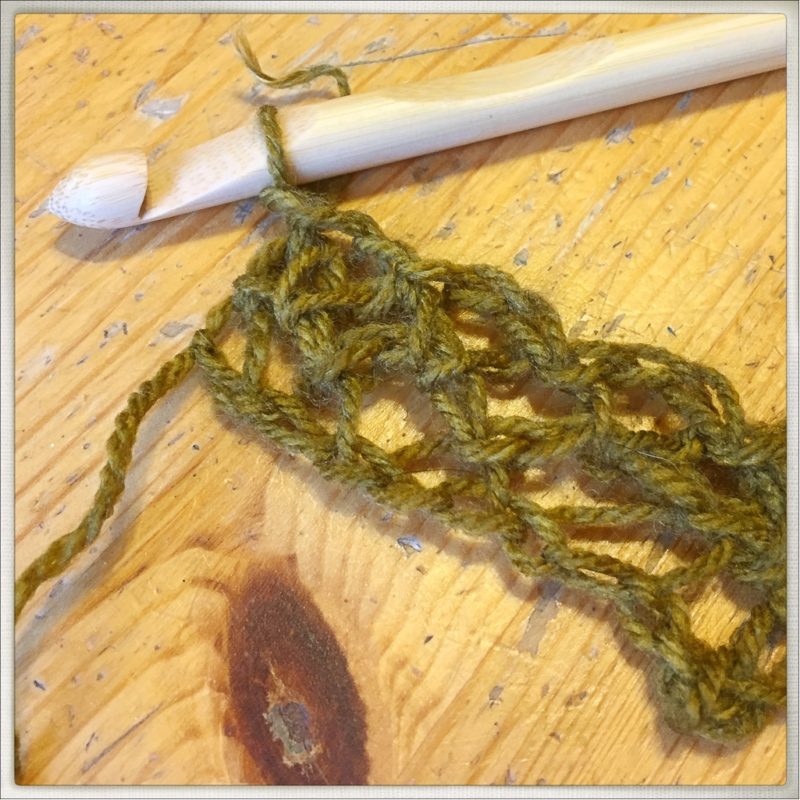
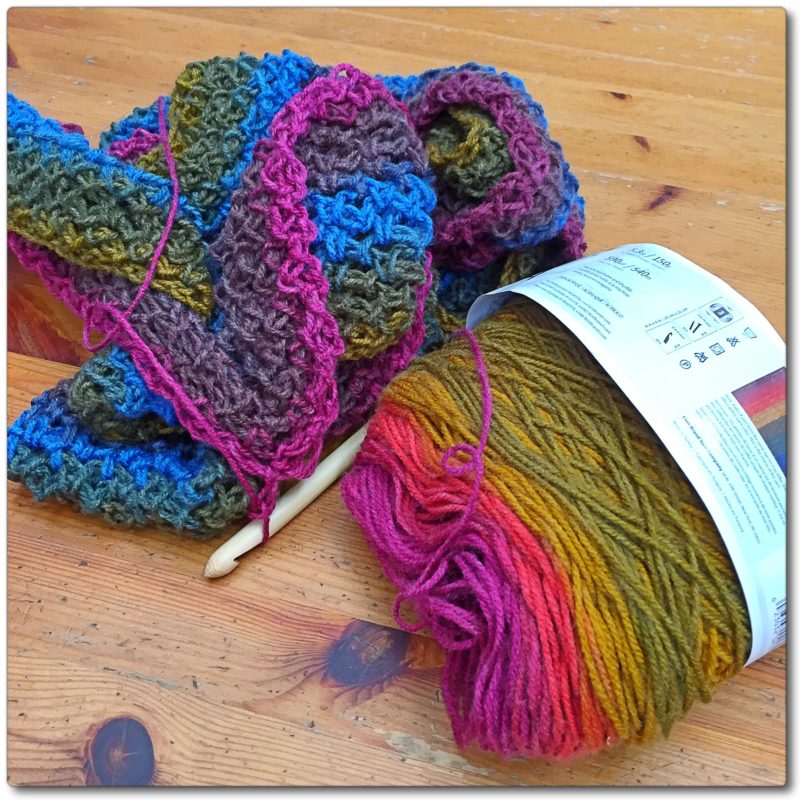
This will create a very net-like, loose “weave” with a lot of stretch and airiness to it (which really reminds me of mermaid scales). To finish off the last row, simply chain only one stitch instead of two between your loop slip stitches – this way your final row will match the tension of the first row (the original chain base where you began). Full disclosure: I also threw in a couple of “slip one, chain one” rows at about 1/3 and 2/3 of the width of the scarf, just to keep it from being too too stretchy…
Definitely a quick and easy project (once I had figured out what I wanted to do, that is 😉 )!
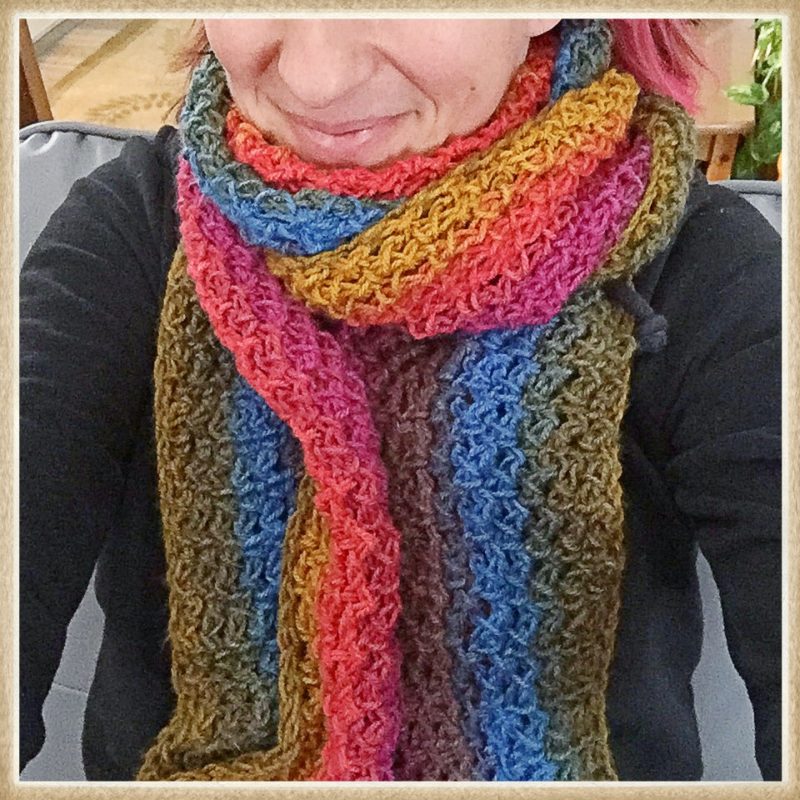
It’s long enough to wrap around my neck twice and still go past my waist. It’s colourful enough to go with both of my fall jackets: my teal rain jacket and my fuchsia fleece jacket (not to mention my hot pink rain boots). It’s made out of a soft acrylic, so it’s easy to wash/dry – and not as itchy as wool (I’m very sensitive to natural fibers, unfortunately). Plus, it’ll keep me cozy for the chilly months ahead – a perfect Mountain Mermaid accessory! I only wish I had purchased more yarn when I could – Lion Brand is sold out online, and I can’t seem to find it anywhere that I normally shop! Ah, well. Perhaps I shall have to experiment with some of the other “cakes” out there.
Anyhow. Just a little something I’ve been working on this month. Hope the back-to-school season has been treating y’all well. Stay warm! 😉
UPDATE: I picked up a “big cake” of Caron yarn in Blueberry Torte and tested this stitch/my pattern out on it. I wasn’t impressed enough to finish a scarf – because the gauge is thicker, it didn’t have the airiness (or softness) I was looking for. Maybe I’ll try again with a larger hook or do a different project altogether with it…
My 8yo son decided he loves my Mountain Mermaid scarf too, so he wanted me to make him one – except in his favourite colour: green.
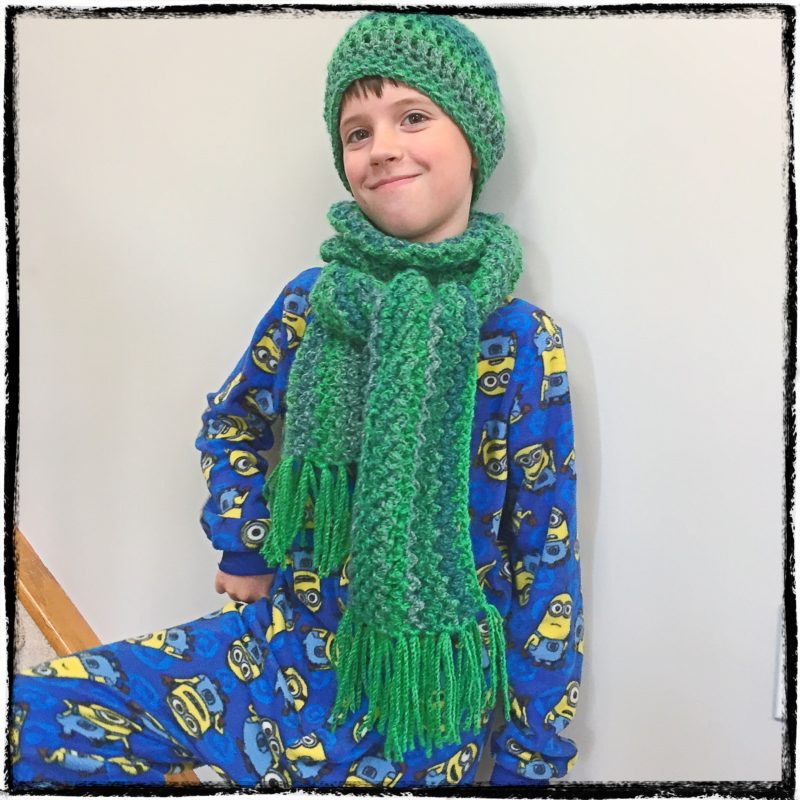
So I whipped him up a silly little crocheted set using Loops & Threads Barcelona yarn in Greenery (140 stitches long for the scarf, double crochet in rounds for the hat). It’s more “grandma” than I usually aspire to, but he loves it. Cheeky boy. 😉

4 Replies to “Mountain Mermaid Scarf”
Kate, these are beautiful!
I love the stitch pattern you created for the first one here, and that Blueberry Torte is absolutely gorgeous! Looking forward to seeing what you will make with that.
Have a wonderful weekend, my friend!
xo.
I’d really like to divide it up into the individual colours and make some sort of modern granny square blanket… but I don’t know if I have the patience. 😉
Beautiful pattern. I would love to make it for a Christmas present. What size hook did you use?
I’m afraid I really don’t know, Pat!!! I just pulled out the biggest hook I had, and it’s this bamboo one – without any number on it at all! But there’s lots of pics for reference – you can always look at them at the yarn store and try to get the closest looking one??? Good luck! =)